Windows
Stamp
Cursors
Stamp
Cursors
Don Denman
These Windows ‘stamp’ cursors have been tested with Windows 7 and Windows 10. (They will probably work on any version Windows.) These are ‘fun’ and serve no meaningful purpose other than an acknowledgement to your favorite hobby. Windows cursors are limited to 32x32 pixels so please note there is only so much detail that can be put into the graphics. A few of the cursors have no stamp-relationship. This is intentional, for a cursor like a cross mark it did not make sense to try to torture it into a stamp-related design.
After installing and if you decide to not use the cursors, you can easily revert back to any previous cursors you had including the Windows defaults. There are about 15 default cursors that Windows uses at various times. There is a basic automatic install or you can manually install the cursor files; instructions for both are located below. The automatic install will change 15 cursors. If you would like to pick and choose which cursors to change then you should do the manual install.
Windows Automatic Install Instructions
Windows 7 screen shots shown, but Windows 10 is almost the same. Click on image to view high resolution
Step 1.
Download and the save the StampSmarterCursor.zip file to your desktop.
Step 2.
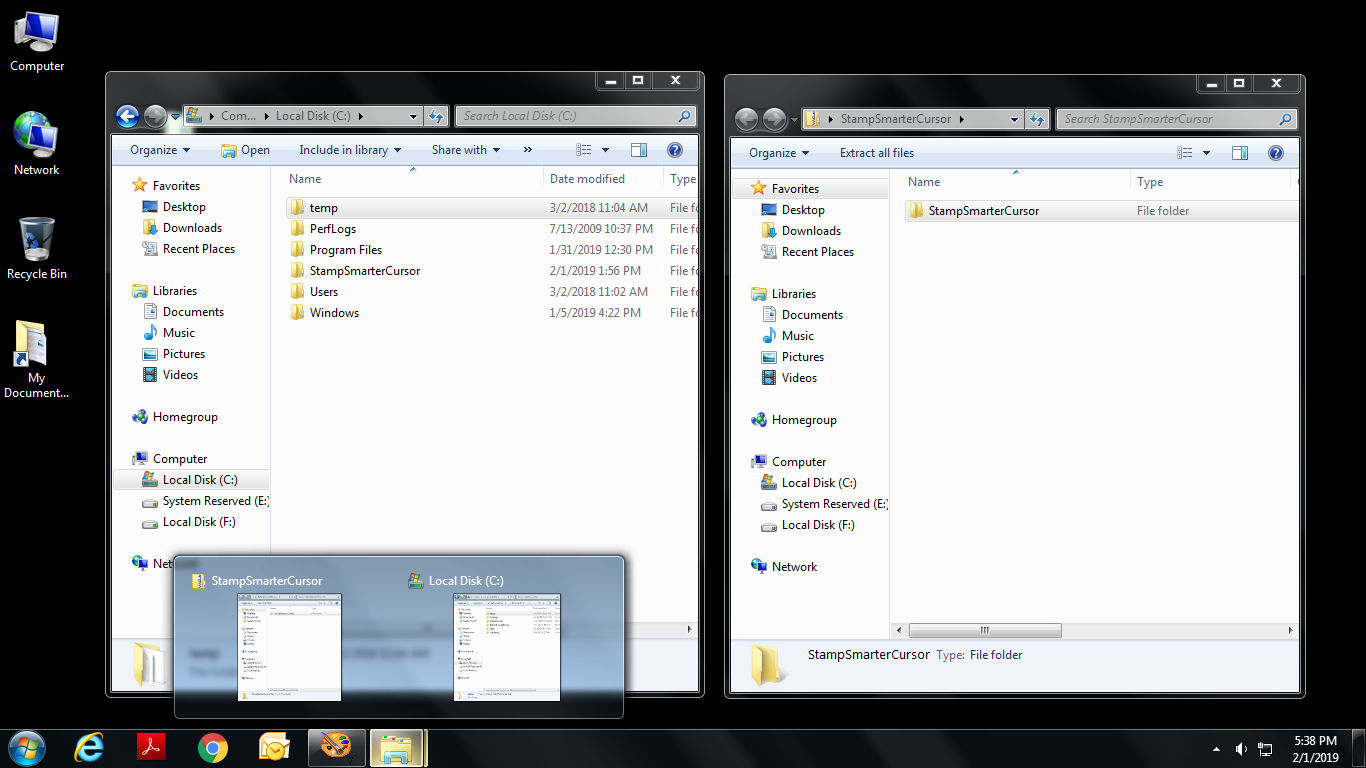
Extract and copy the StampSmarterCursor folder to your C: drive as shown. Do not rename the folder.
Step 3.
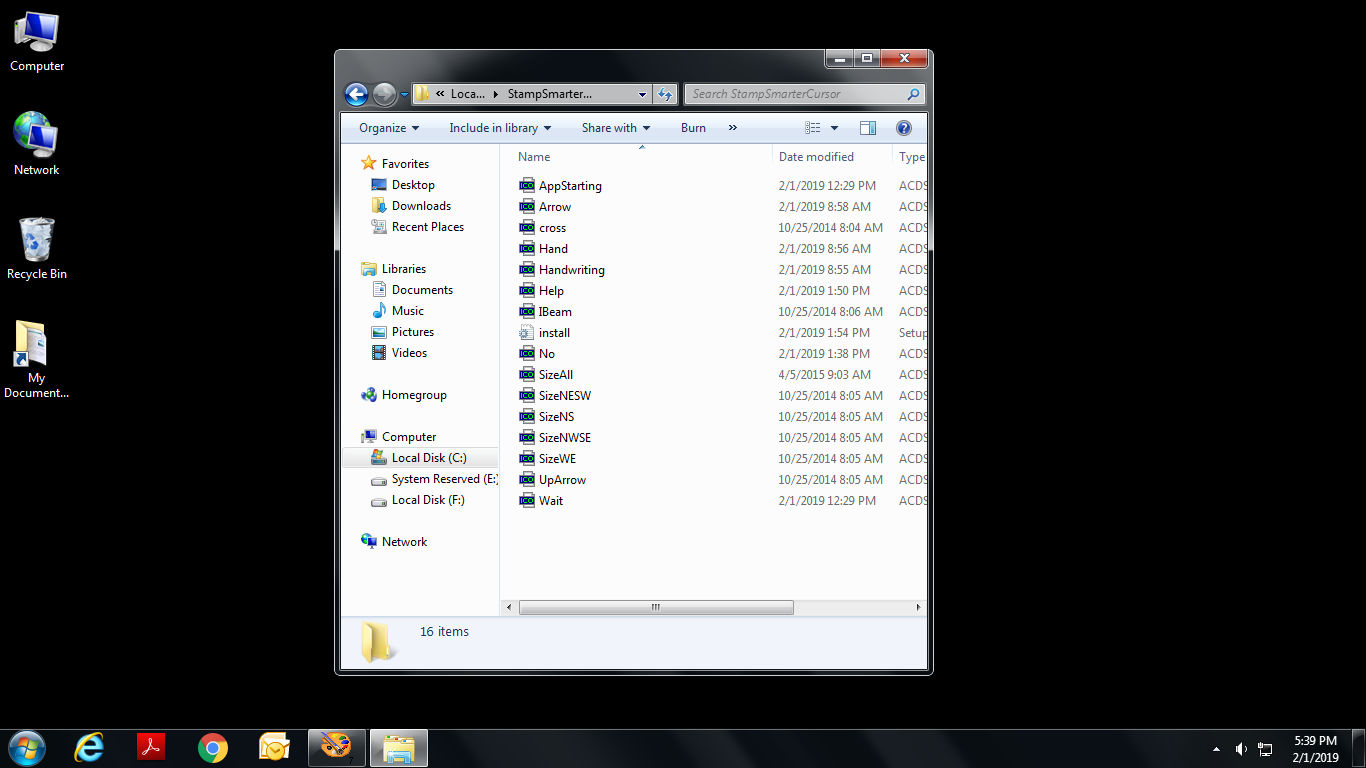
Navigate to the folder and locate the install file. Right click on the install file and select 'install' from the drop down menu.
Step 4.
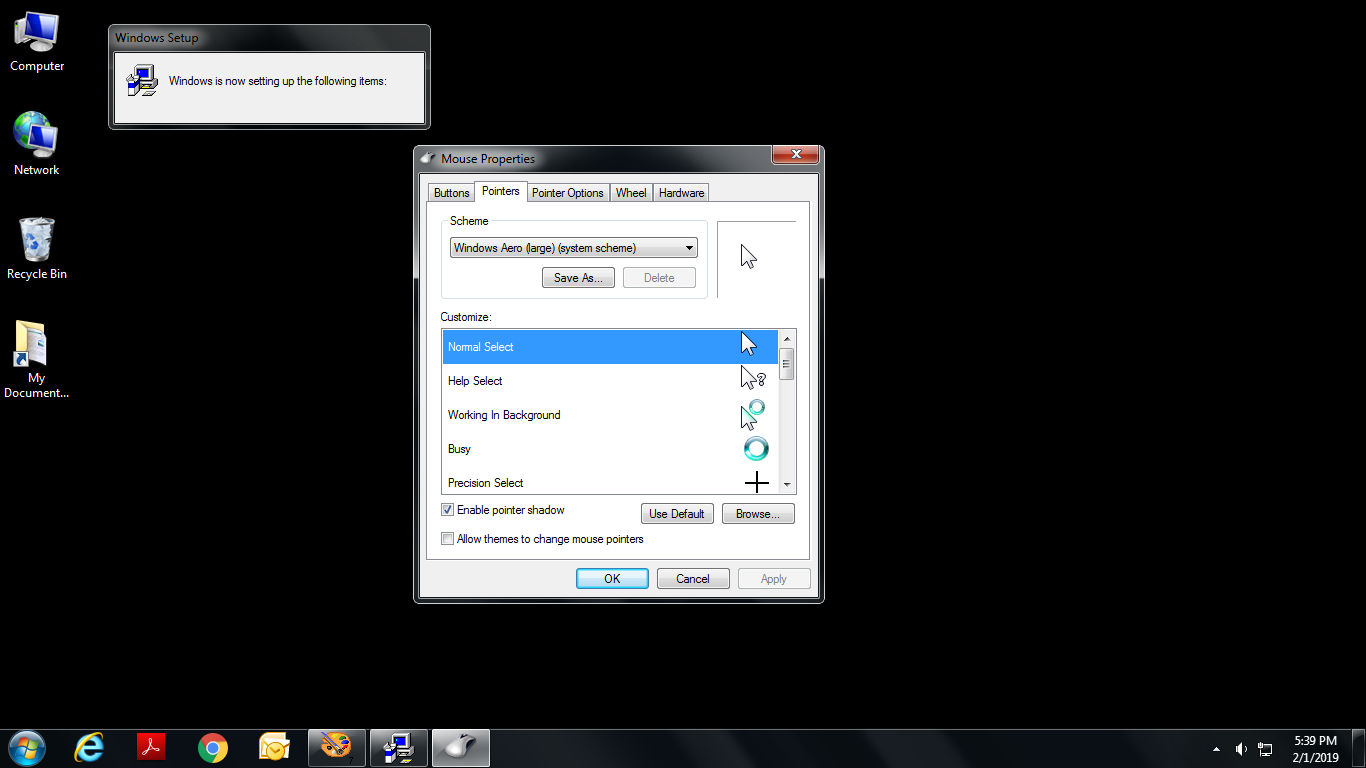
The setup will install the files and open the Mouse Properties dialog box as shown at left.
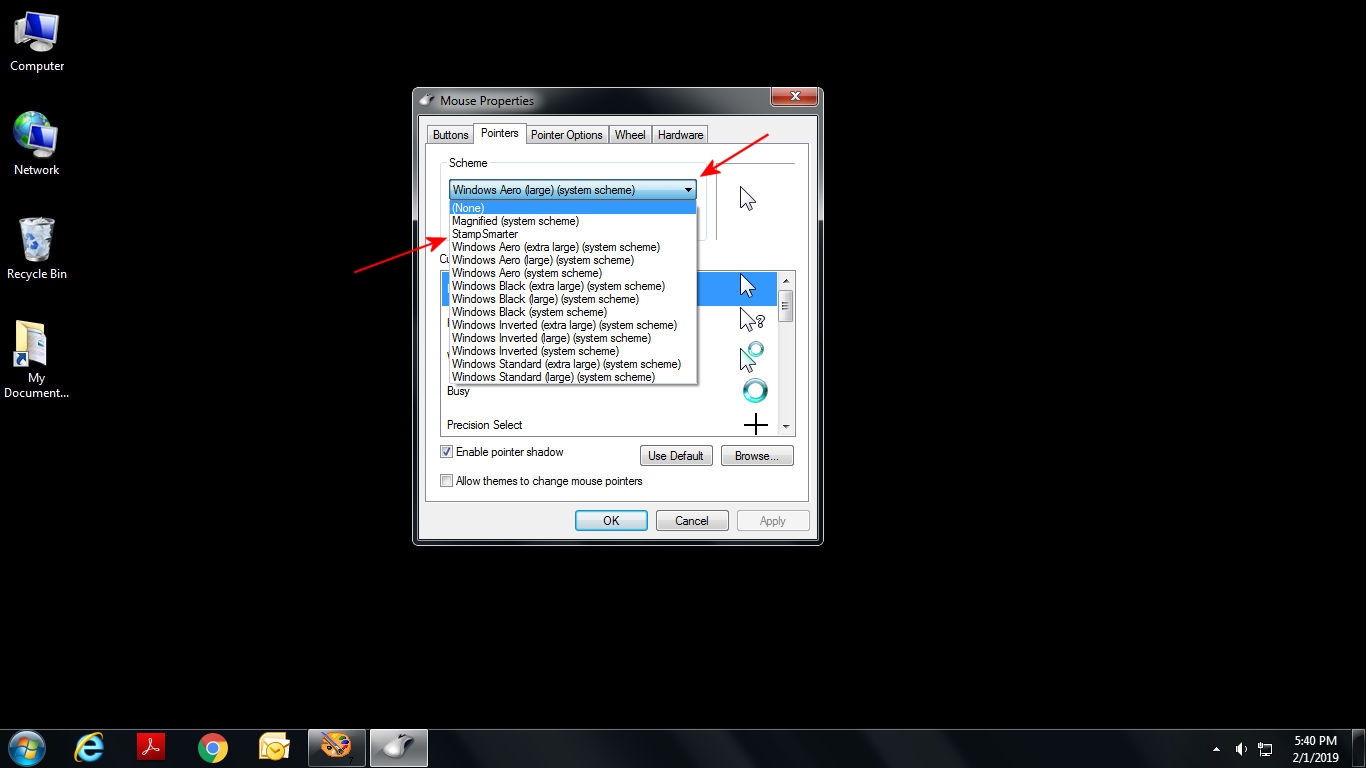
Step 5.
Click on the drop down arrow and then select Stamp Smarter Scheme. After selecting Stamp Smarter, cllick to 'Ok' button.
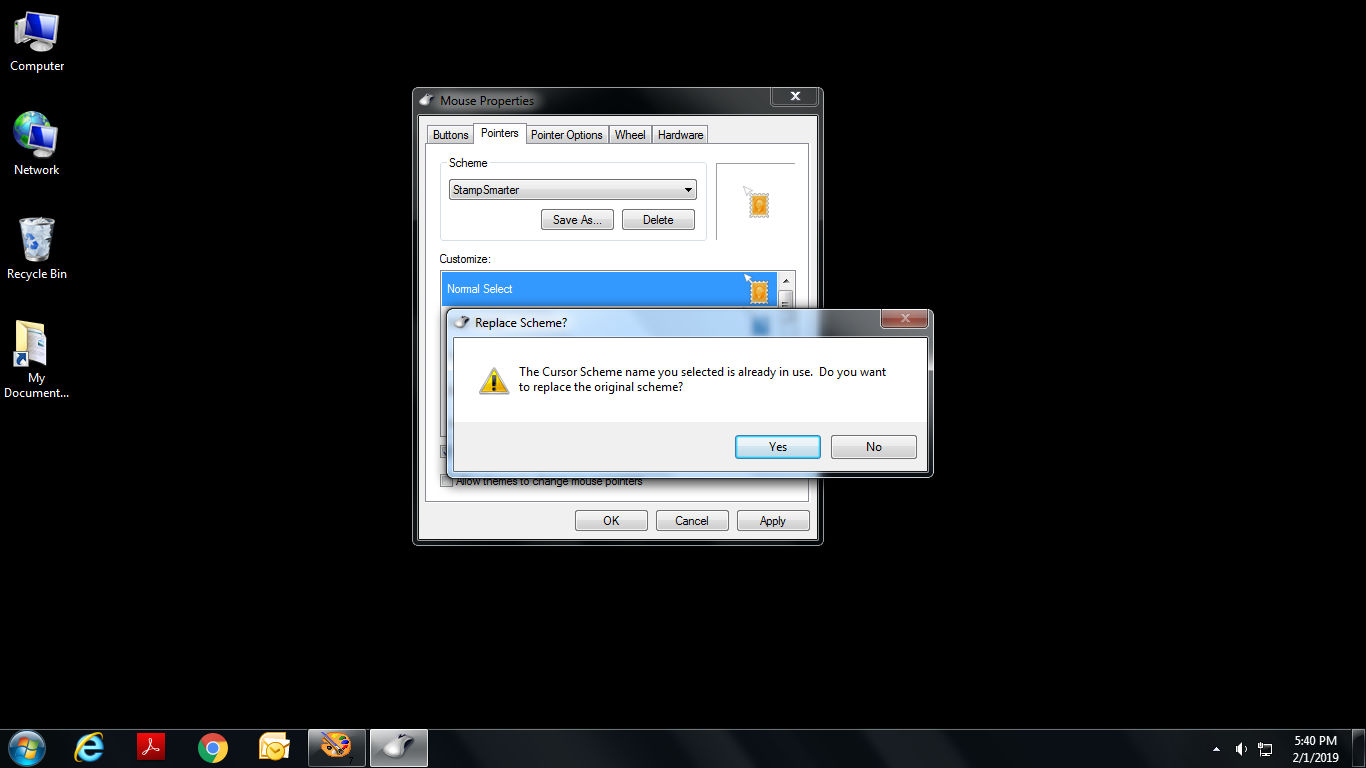
Step 6.
If Windows presents the dialog box shown at left, simply click 'Ok'.
Your new stamp cursors are now installed.
Windows Manual Install Instructions
Step 1.
Download and the save the StampSmarterCursor.zip file to your desktop.
Step 2.
Extract and copy the StampSmarterCursor folder any location on your hard drive.
Step 3.
Navigate to the Control Panel and click on 'Mouse'.
Step 4.
Click on the Pointers tab. The select the curors you would like to replace and then click the 'browse' button to naviagte to the Stamp Smarter folder. Select the cursor file you would like to use.
Click on 'Ok'.
Windows Cursor Reset Instructions
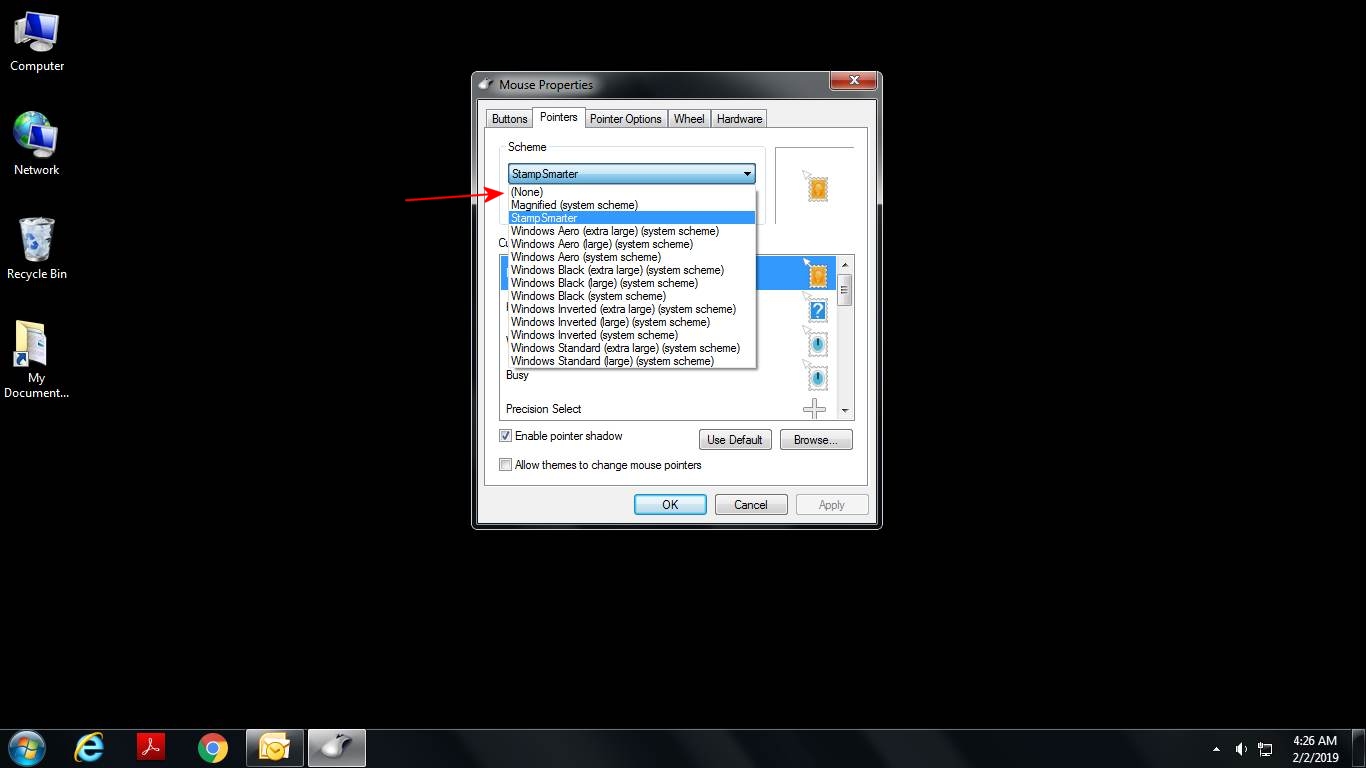
Step 1.
To remove the Stamp Smarter curors and reset yoru cursors back to the Window default, click on Scheme drop down and then select 'None'. Click on "ok' button and yoru cursors will be reset.